
GreenRope Zapier (Invite Only)
Table of Contents
- Introduction
- Use Cases
- Using GreenRope Trigger
- Using GreenRope Action
Introduction
Zapier lets you connect the apps you use, automate tasks, get more out of your data.
Zaps are automations created using Triggers and Actions. You can use Zaps to connect any two Zapier-supported apps to each other.
GreenRope is one of the Zapier-supported apps. The app is currently invite-only.
Use Cases
1. GreenRope new contact trigger > Gmail send email action
If a new contact is added to GreenRope then have Gmail sends an email to the newly added contact.
2. Salesforce new contact trigger > GreenRope add contact action
If a new contact is added to Salesforce then automatically adds the new contact into GreenRope.
Getting Started
- Register a Zapier account.
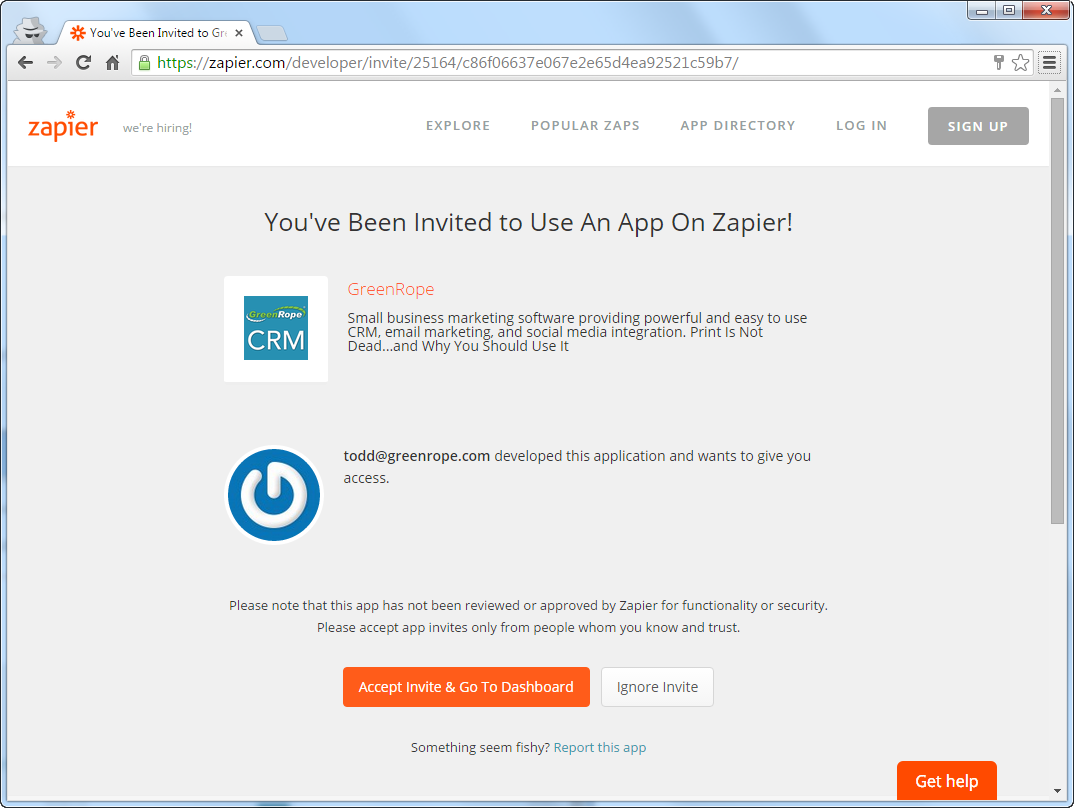
- Go to this activation link.
- Click on ‘Accept Invite & Go To Dashboard’ to activate the GreenRope app.
Using GreenRope Trigger
Make A Zap!
Click on ‘MAKE A ZAP!’ found on the main menu to go to the form for creating a new Zap.
Step 1: Picking A Trigger And An Action
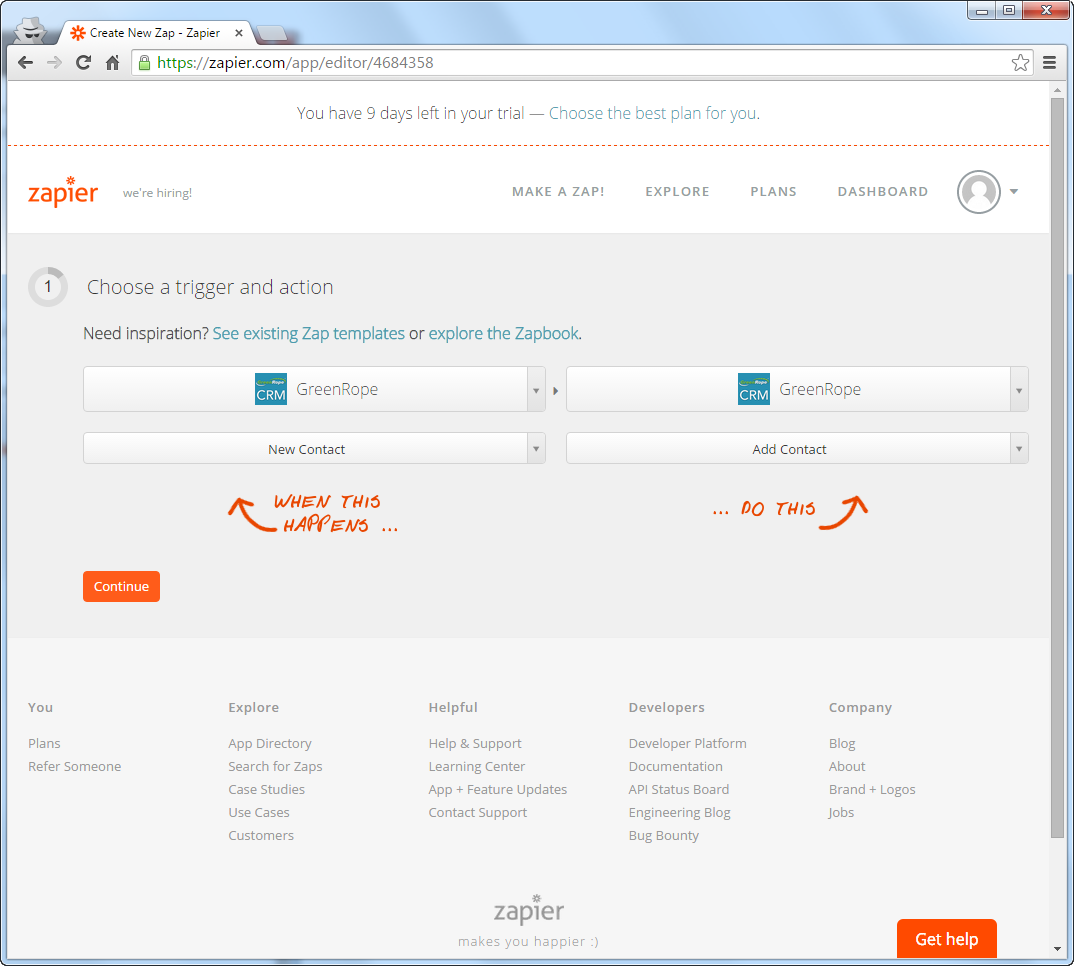
- In the ‘Choose a Trigger app’ dropdown box, search for ‘GreenRope’ and select it as the trigger.
- Select a desired trigger. Eg. ‘New Contact’.
- In the ‘Choose an Action app’ dropdown box, select the app desired.
- Select an action desired.
- ‘Continue’.
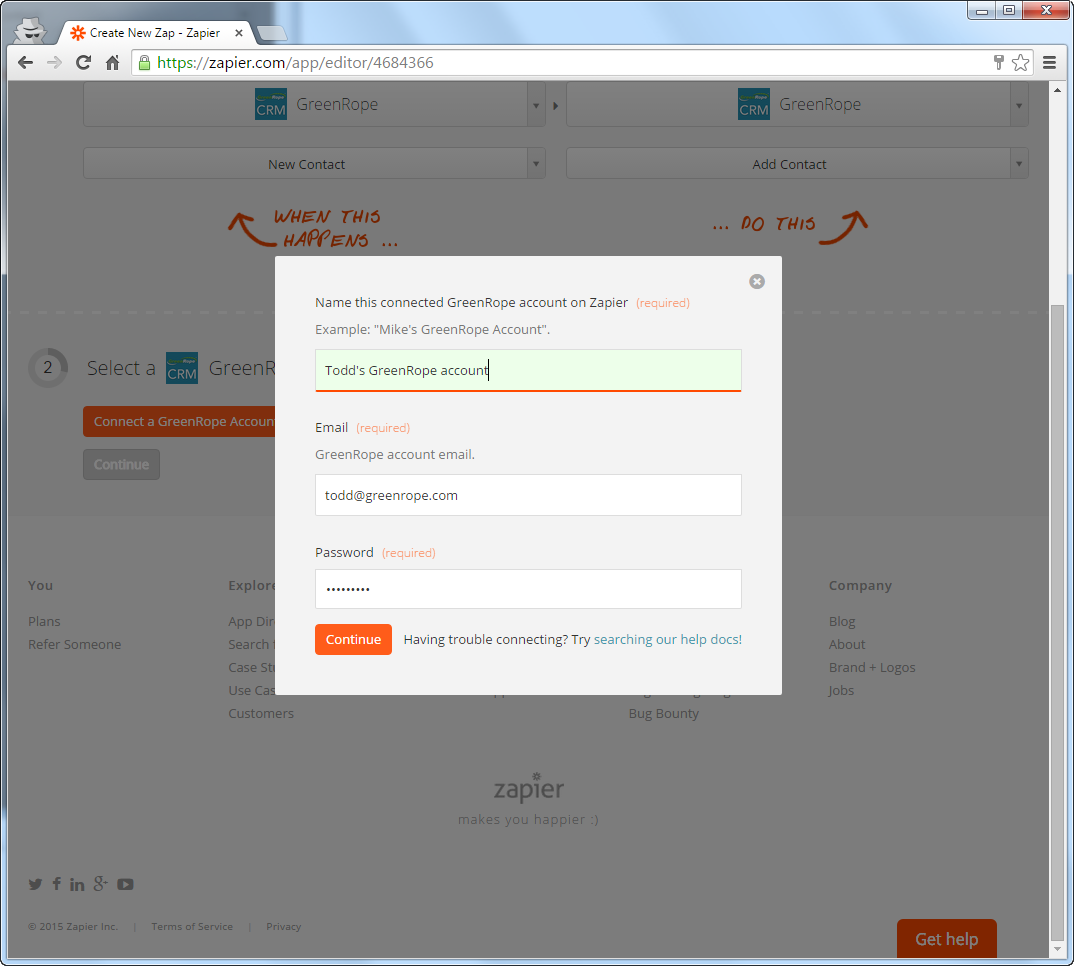
Step 2: Connect To Trigger App Account
- For user that already has a GreenRope account connected to Zapier, choose one from the dropdown box.
- For first time user, click on the ‘Connect a GreenRope Account’ button to open the login screen.
- Enter a name for this connection.
- Enter the email used to login GreenRope.
- Enter the password used to login GreenRope.
- ‘Test this Account’
- ‘Continue’.
Step 3: Connect to Action App Account
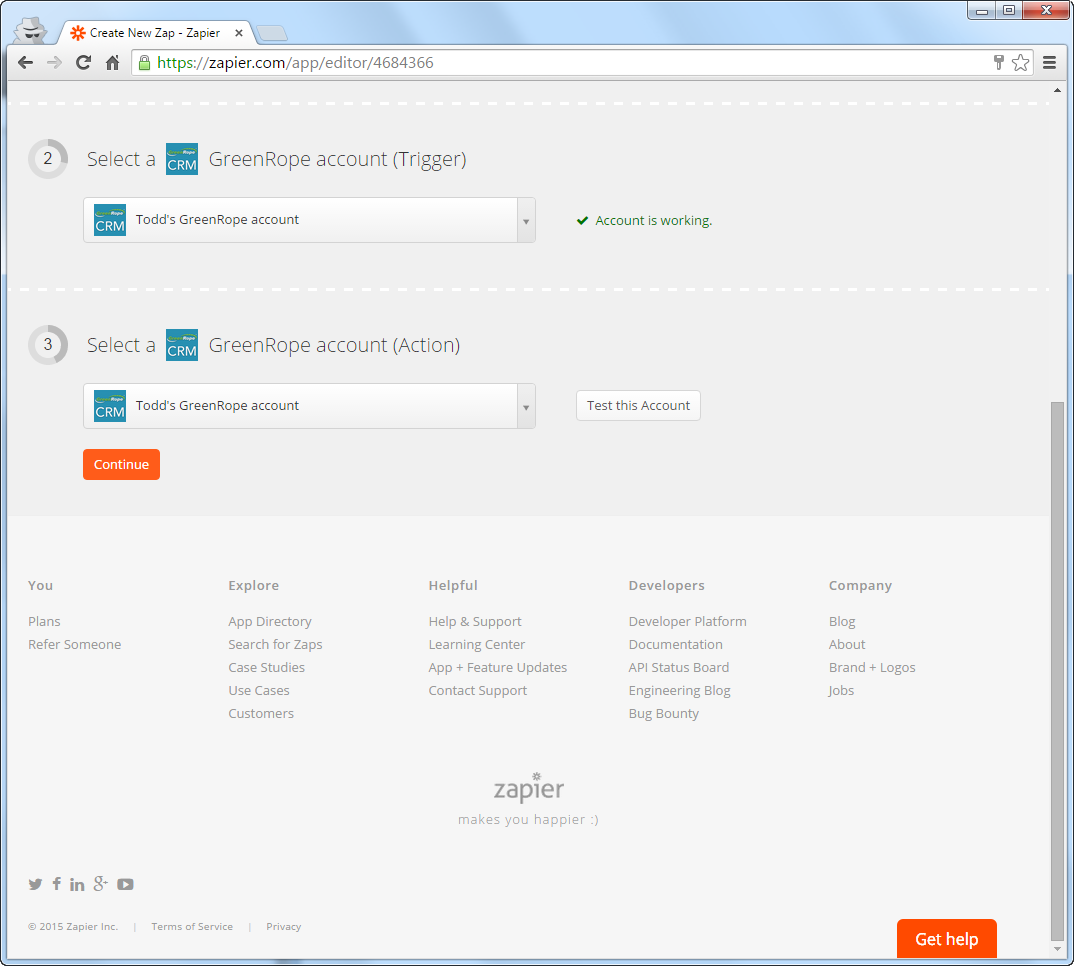
- Choose one of the account for the action app from the dropdown box.
- For first time user, click on the ‘Connect a … Account’ button to open the login screen.
- Provide the credentials and login.
- ‘Test this Account’.
- ‘Continue’.
Step 4: Trigger Filters
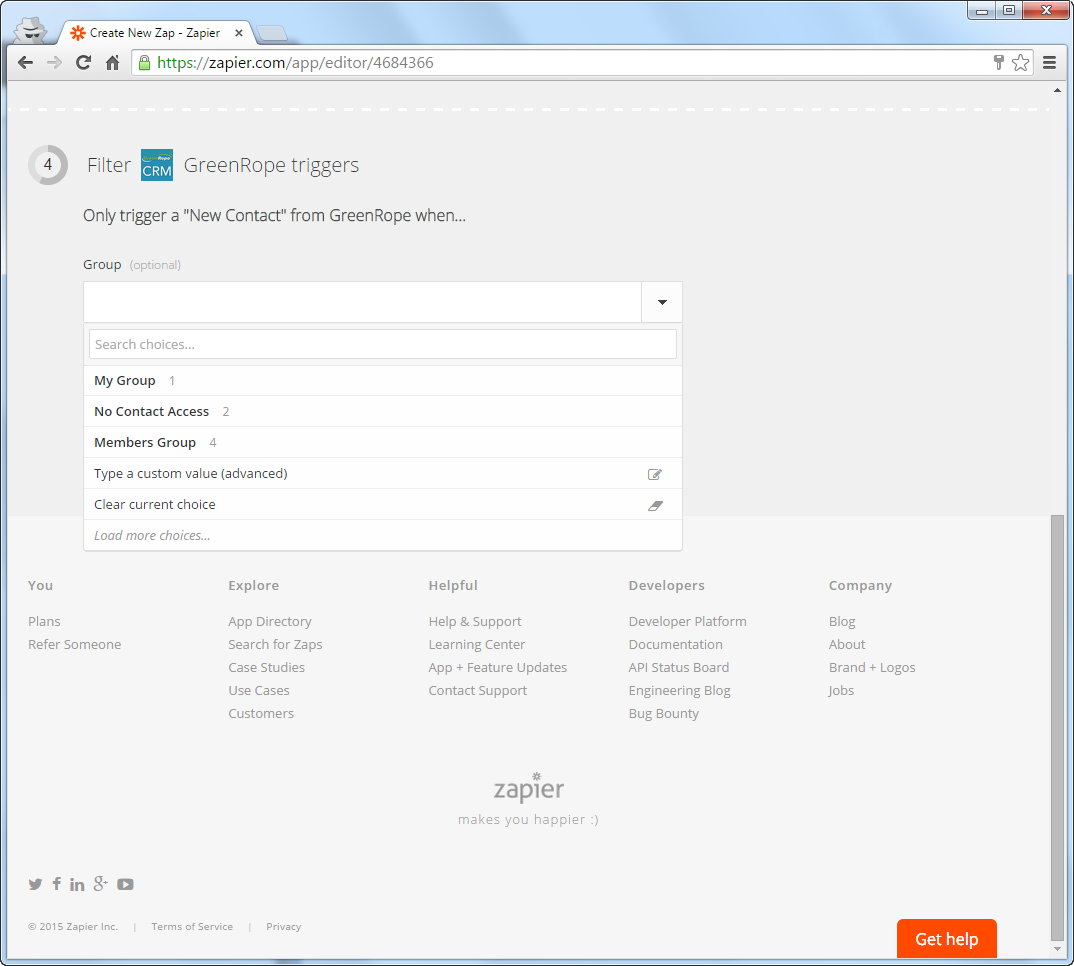
Some GreenRope triggers come with filters that allow the user to filter the results returned from GreenRope. For example, the ‘New Contact’ trigger comes with a ‘Group’ filter so that Zapier only check for new contacts added into a particular group.
- To use the filter, select one of the group from the dropdown.
- Leaving the filter blank will make Zapier looks for new contact added from all of the groups in GreenRope.
- ‘Continue’.
Step 5: Matching Data From Trigger To Action
Depending on the action chosen in ‘Step 1’, various relevant input fields will be available to input data to the action app.
- To use and match up the data returned from GreenRope, click on ‘Insert * fields’ button.
- Select the data column that matches.
- ‘Continue’.
Step 6: Test This Zap
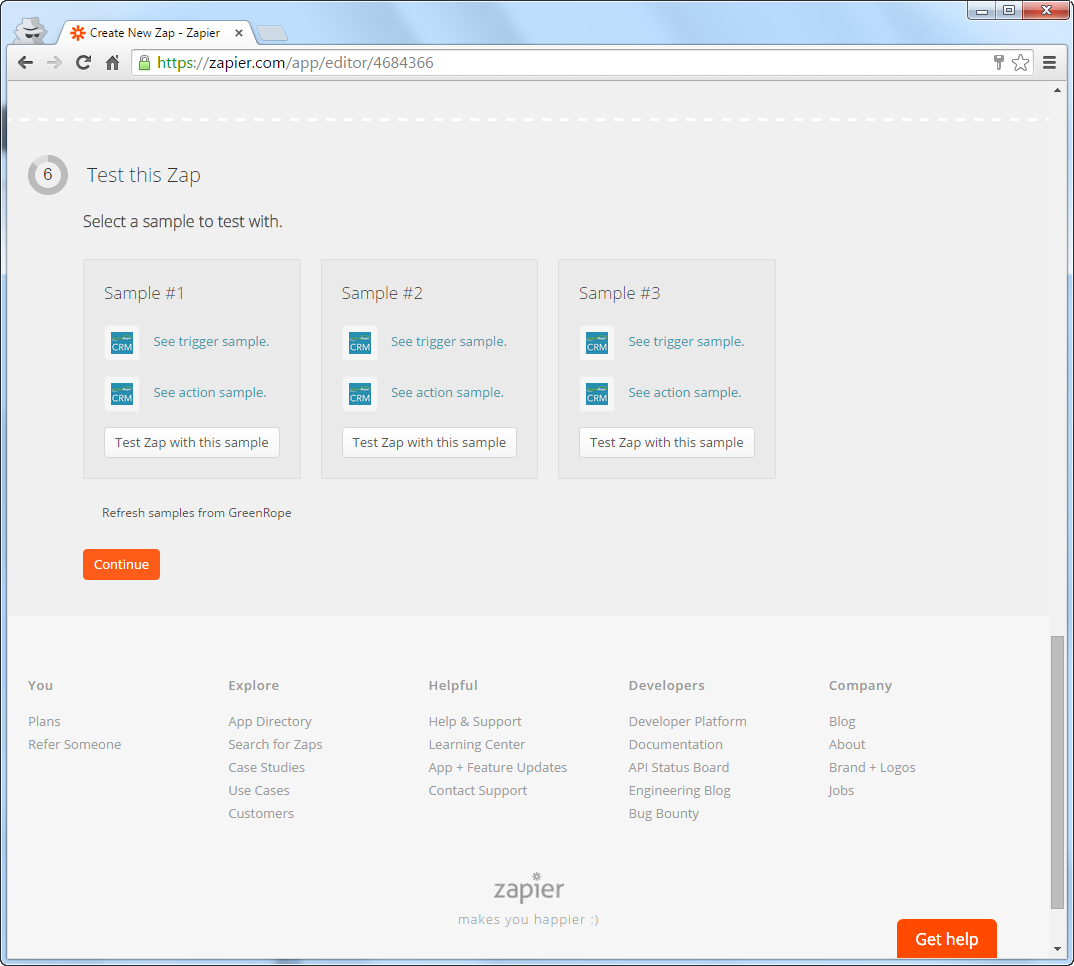
- ‘Test GreenRope trigger’ should return some test results.
- Test the zap with some sample provided.
- The user can click on the sample to see sample data returned by the trigger.
- The user can also click on the sample to see example data that will be sent to the action app.
- ‘Continue’
Step 7: Name This Zap
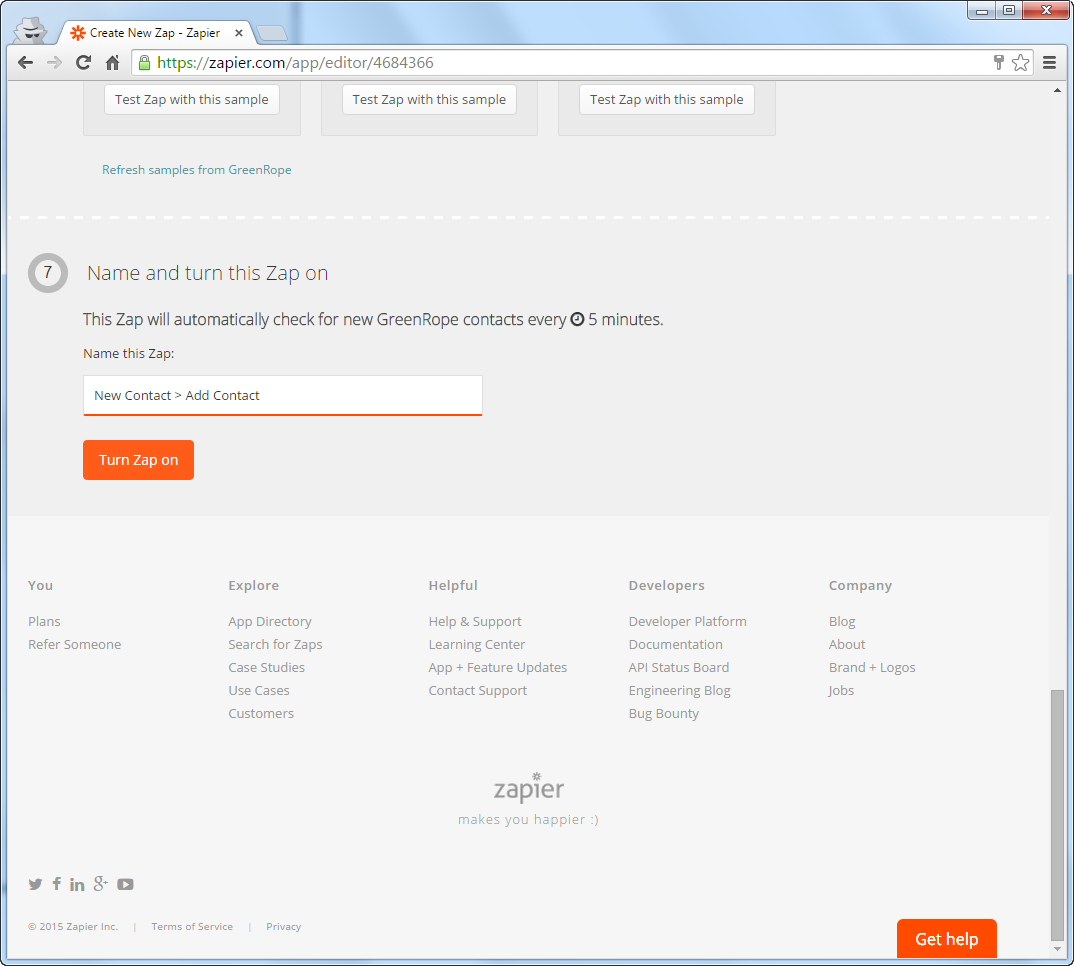
- Enter a name for this zap.
- ‘Turn Zap on’
Using GreenRope Action
Make A Zap!
Click on ‘MAKE A ZAP!’ found on the main menu to go to the form for creating a new Zap.
Step 1: Picking A Trigger And An Action
- In the ‘Choose a Trigger app’ dropdown box, select the app desired.
- Select a desired trigger.
- In the ‘Choose an Action app’ dropdown box, search for ‘GreenRope’ and select it as the trigger.
- Select a desired action. Eg. ‘Add Contact’.
- ‘Continue’.
Step 2: Connect To Trigger App Account
- Choose one of the account for the trigger app from the dropdown box.
- For first time user, click on the ‘Connect a … Account’ button to open the login screen.
- Provide the credentials and login.
- ‘Test this Account’.
- ‘Continue’.
Step 3: Connect to Action App Account
- For user that already has a GreenRope account connected to Zapier, choose one from the dropdown box.
- For first time user, click on the ‘Connect a GreenRope Account’ button to open the login screen.
- Enter a name for this connection.
- Enter the email used to login GreenRope.
- Enter the password used to login GreenRope.
- ‘Test this Account’
- ‘Continue’.
Step 4: Trigger Filters
Depending on the trigger app chosen in ‘Step 1’, various relevant filters will be available to the user.
- Completing this step.
- ‘Continue’.
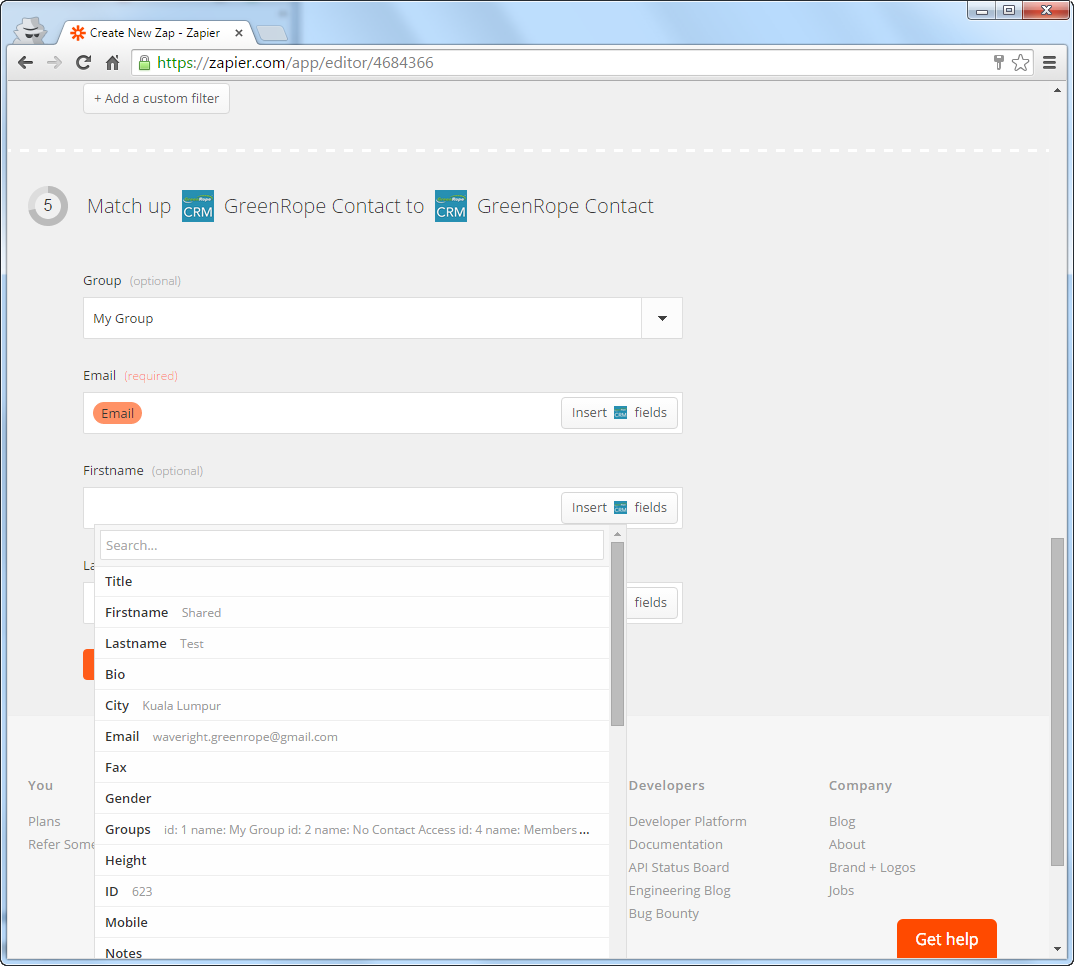
Step 5: Matching Data From Trigger To Action
Depending on the GreenRope action chosen, the user is required to provide and match up data returned by the trigger to the GreenRope action.
Some field is required to perform the GreenRope action. For example, the ‘email’ field is required for the ‘Add Contact’ to GreenRope action.
Dynamic dropdown such as ‘Group’ is also available for users to choose which group from their GreenRope account to add the contact into.
- Click on ‘Insert * fields’ button to match the data from the trigger app to the action input fields
- Select the data column that matches.
- Fill out all the required fields.
- ‘Continue’.
Step 6: Test This Zap
- ‘Test … trigger’ should return some test results.
- Test the zap with some sample provided.
- The user can click on the sample to see sample data returned by the trigger.
- The user can also click on the sample to see example data that will be sent to the action app.
- ‘Continue’
Step 7: Name This Zap
- Enter a name for this zap.
- ‘Turn Zap on’